
Provisioning a vPDB to a TDE OKV-enabled target container requires specifying several TDE provisioning parameters using DCT. Additionally, vPDB parameters, such as the vPDB name, target container, and the snapshot to provision from must be provided. A vPDB can be provisioned to either a TDE OKV-enabled Linked CDB or a vCDB.
For more information, read the Provisioning TDE OKV-enabled vPDB page.
Provision a TDE OKV-enabled vPDB to an existing or linked CDB
To provision a TDE OKV-enabled vPDB to an existing CDB in DCT, follow these steps:
-
Log in to the DCT instance.
-
Navigate to Data > VDB and click Provision VDB. For more information, read the Provisioning a VDB page.
-
Select the Oracle dSource under the dSources tab to provision and click Next.
-
On the Provision Point page, choose any of the following options:
-
Select Provision Point: Select the provision point displayed on this page.
-
Select Exact Time (Slower): Choose the exact date and time using the calendar.
-
SCN Number Refresh (Slower): Enter the Oracle system change (SCN) number range.
-
Bookmarks: Choose the bookmark from the list.
-
Click Next.
-
-
Select target environment and repository and click Next.
-
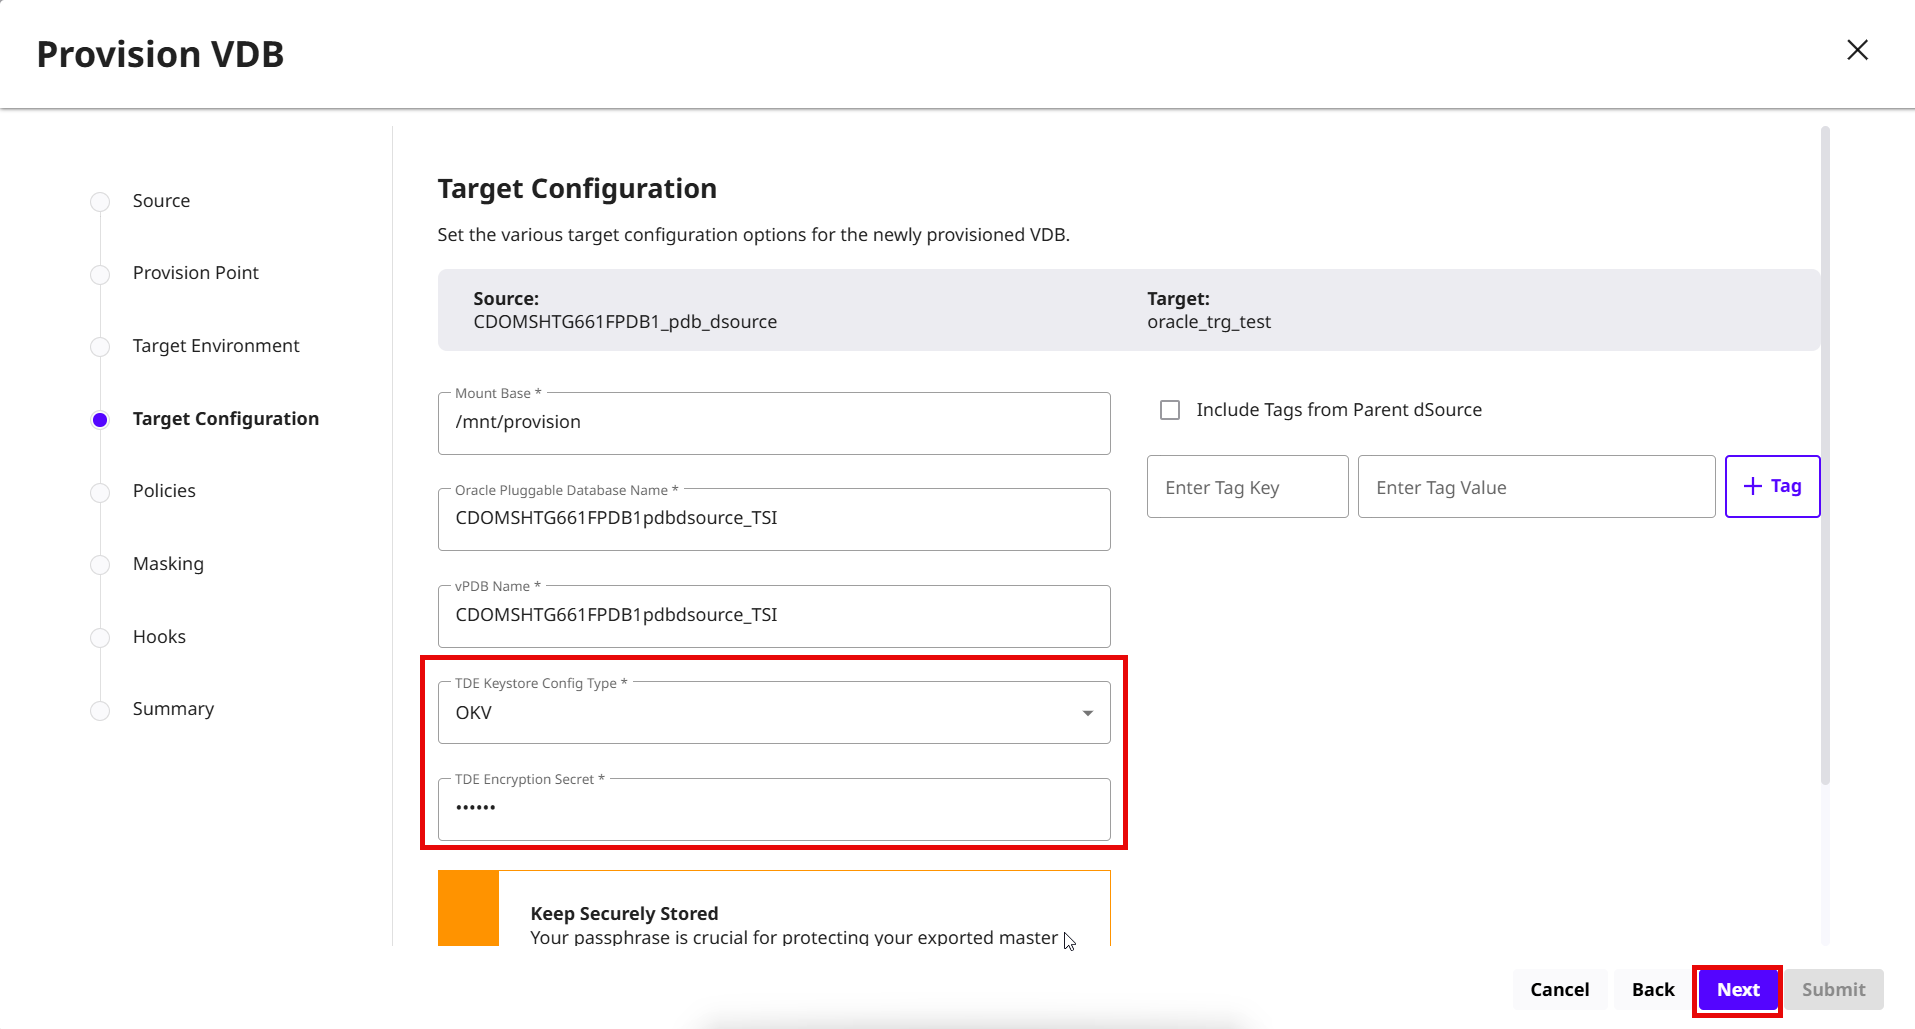
On the Target Configuration page, select the OKV option under the TDE Keystore Config Type and enter the TDE Encryption Secret field value and click Next.
-
On the Policies page, select the default DCT Snapshot and DCT Retention policies and click Next.
-
(Optional) On the Masking page, select the Mask this VDB check box and click Next.
-
(Optional) On the Hooks page, configure provisioning hooks and click Next. For more information, read the Hook operations list and Oracle Hook operations page.
-
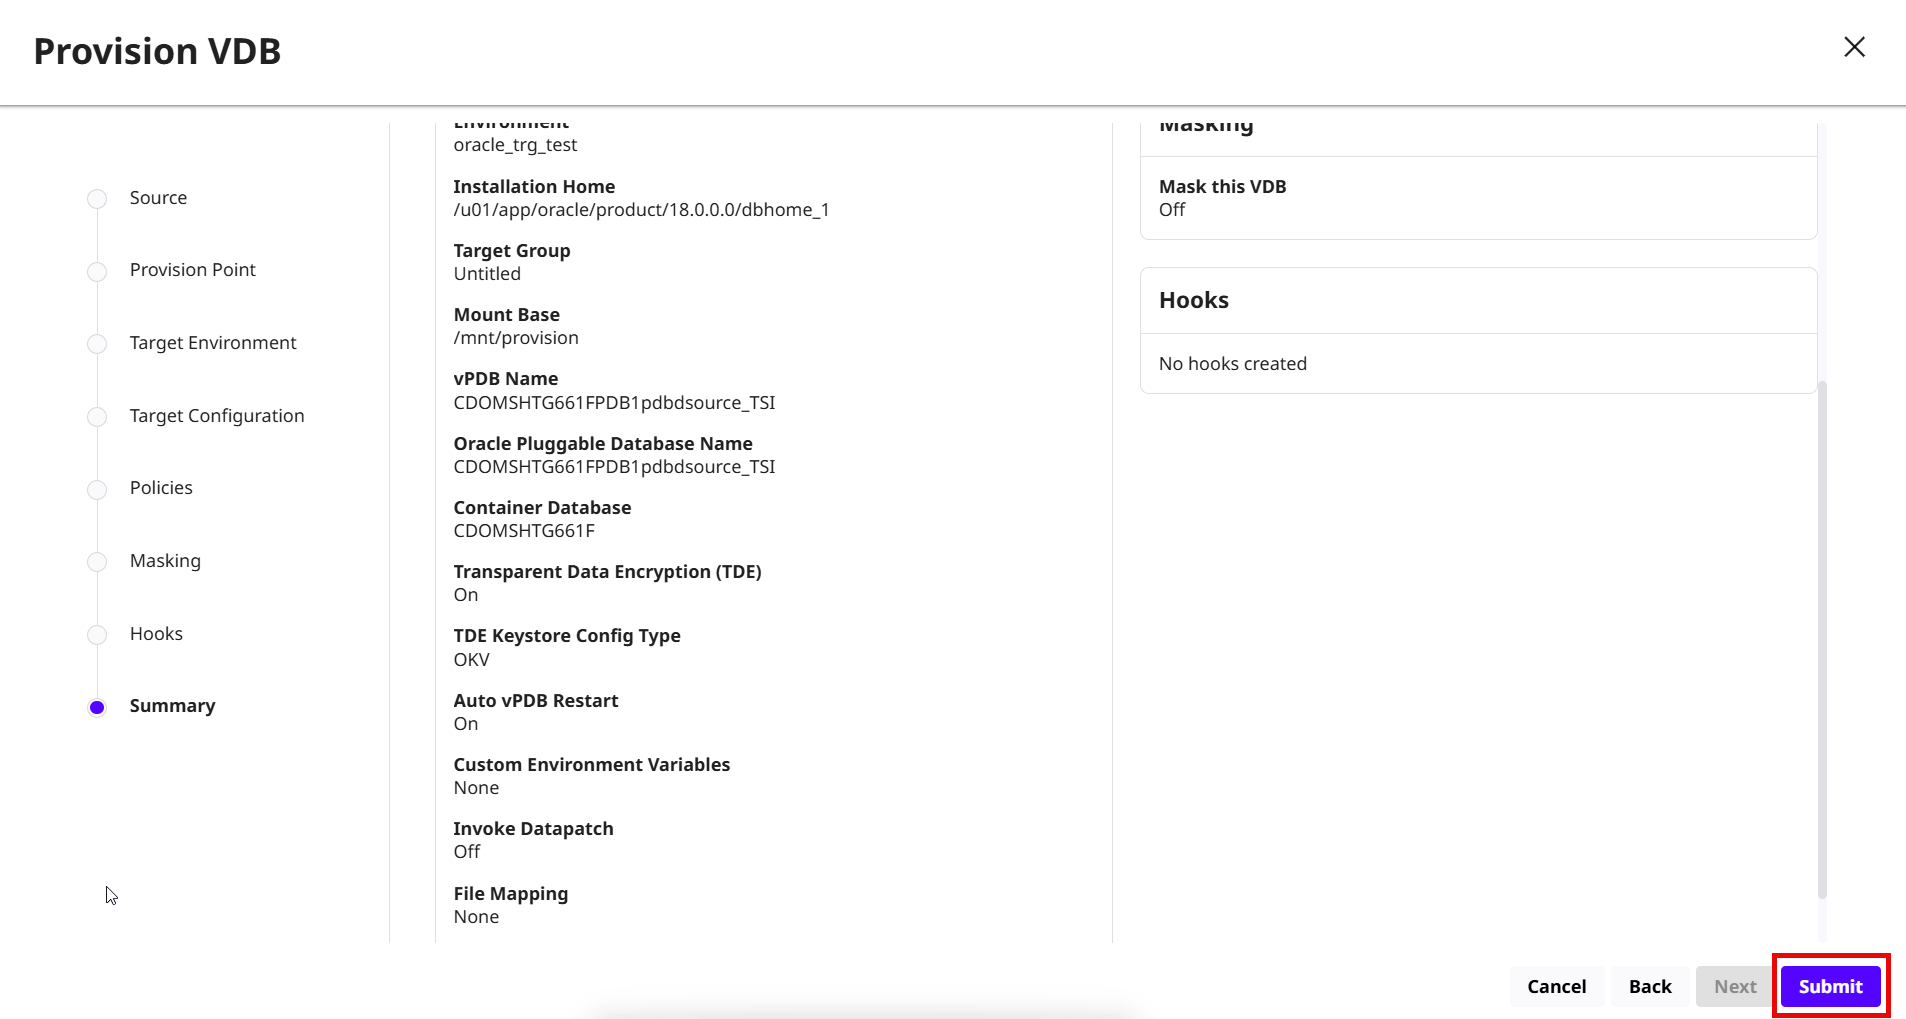
Review the VDB summary details and click Submit.
Provision a OKV-enabled vPDB to a new CDB
To provision a OKV-enabled VDB to a new CDB in DCT, follow these steps:
-
Log in to the DCT instance.
-
Navigate to Data > VDB and click Provision VDB. For more information, read the Provisioning a VDB page.
-
Select the Oracle dSource under the dSources tab to provision and click Next.
-
On the Provision Point page, choose any of the provision point option and click Next.
-
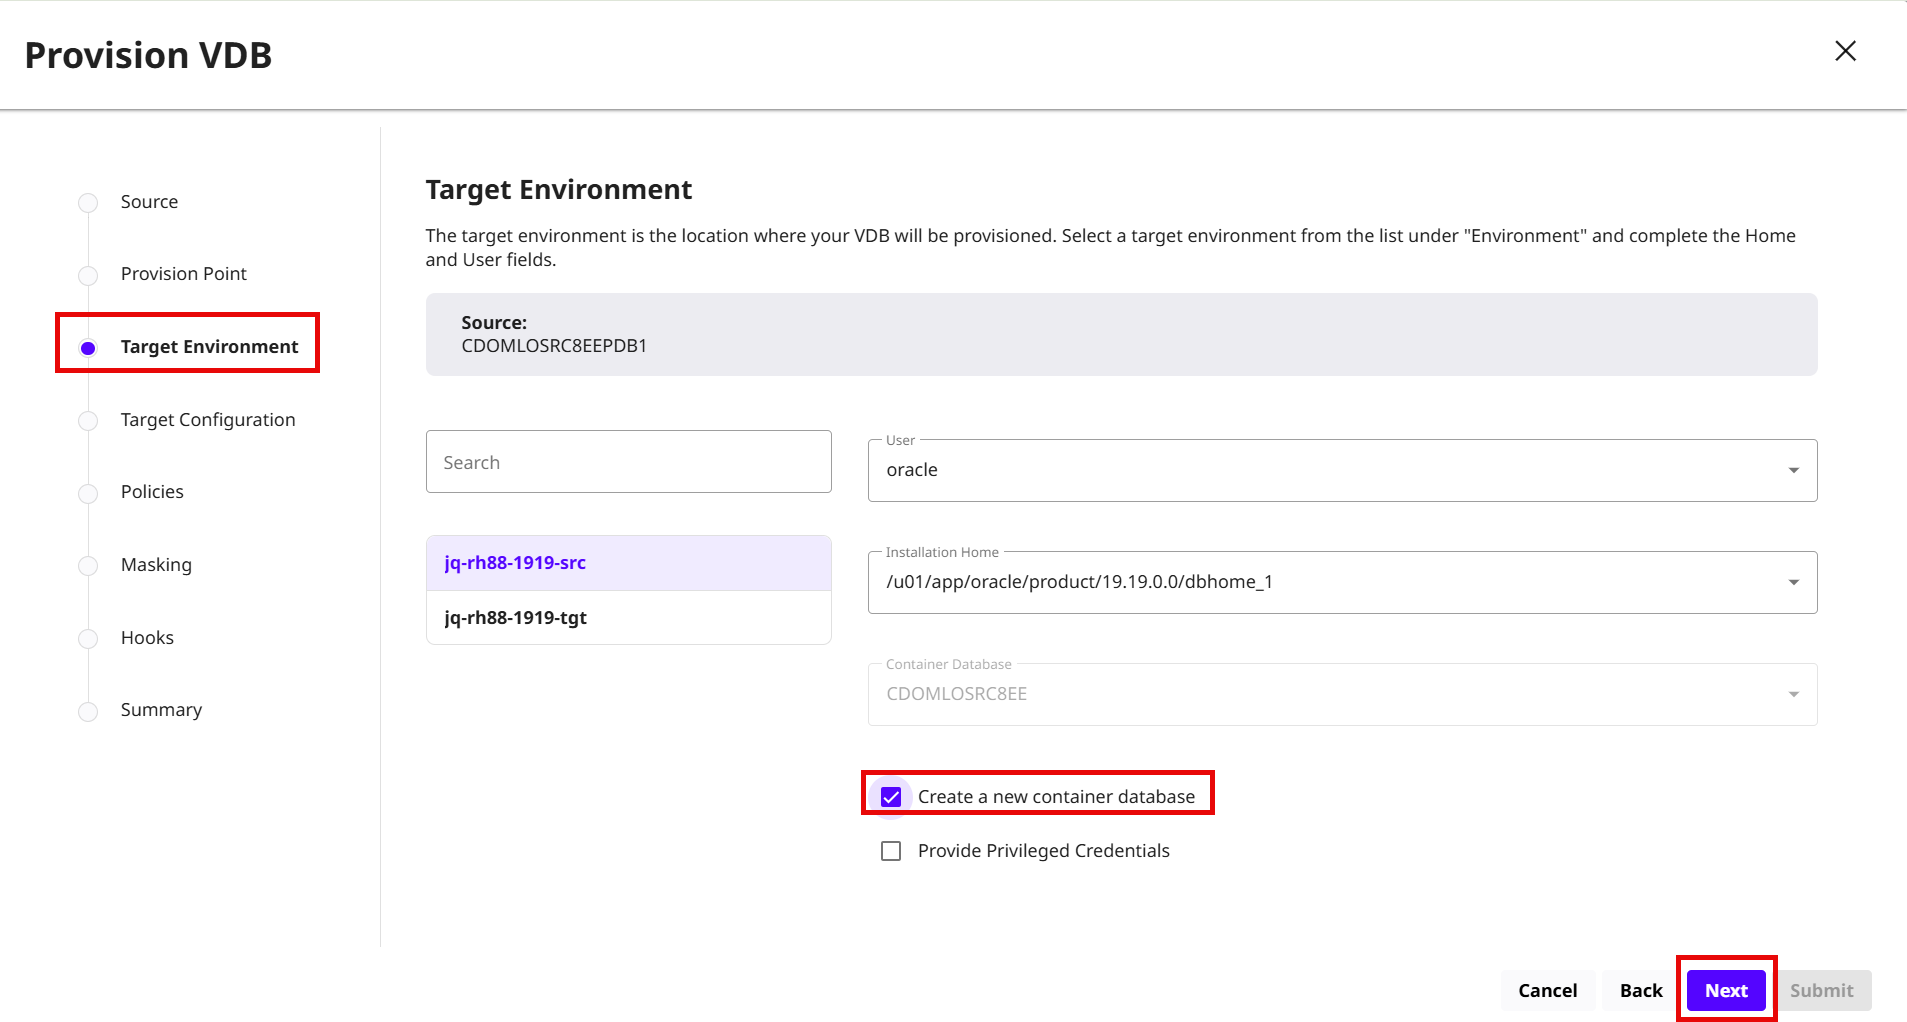
On the Target Environment page, select the Create a new container database check box and click Next.
-
Follow the instructions from step # 6 to 10 in the previous section to complete the provisioning of a new CDB.