
This article describes how to perform the V2P operation conversion of a dSource or a virtual pluggable database (vPDB) into a physical database stored on Oracle Automatic Storage Management (ASM) disk groups. No intermediate storage is needed; the database files are moved directly from Delphix into the ASM diskgroup(s).
To perform the V2P operation on Oracle dSource with a physical Oracle ASM in DCT, follow these steps:
-
Log in to the DCT instance.
-
Navigate to Data>dSources and select any Oracle dSource and click View.
-
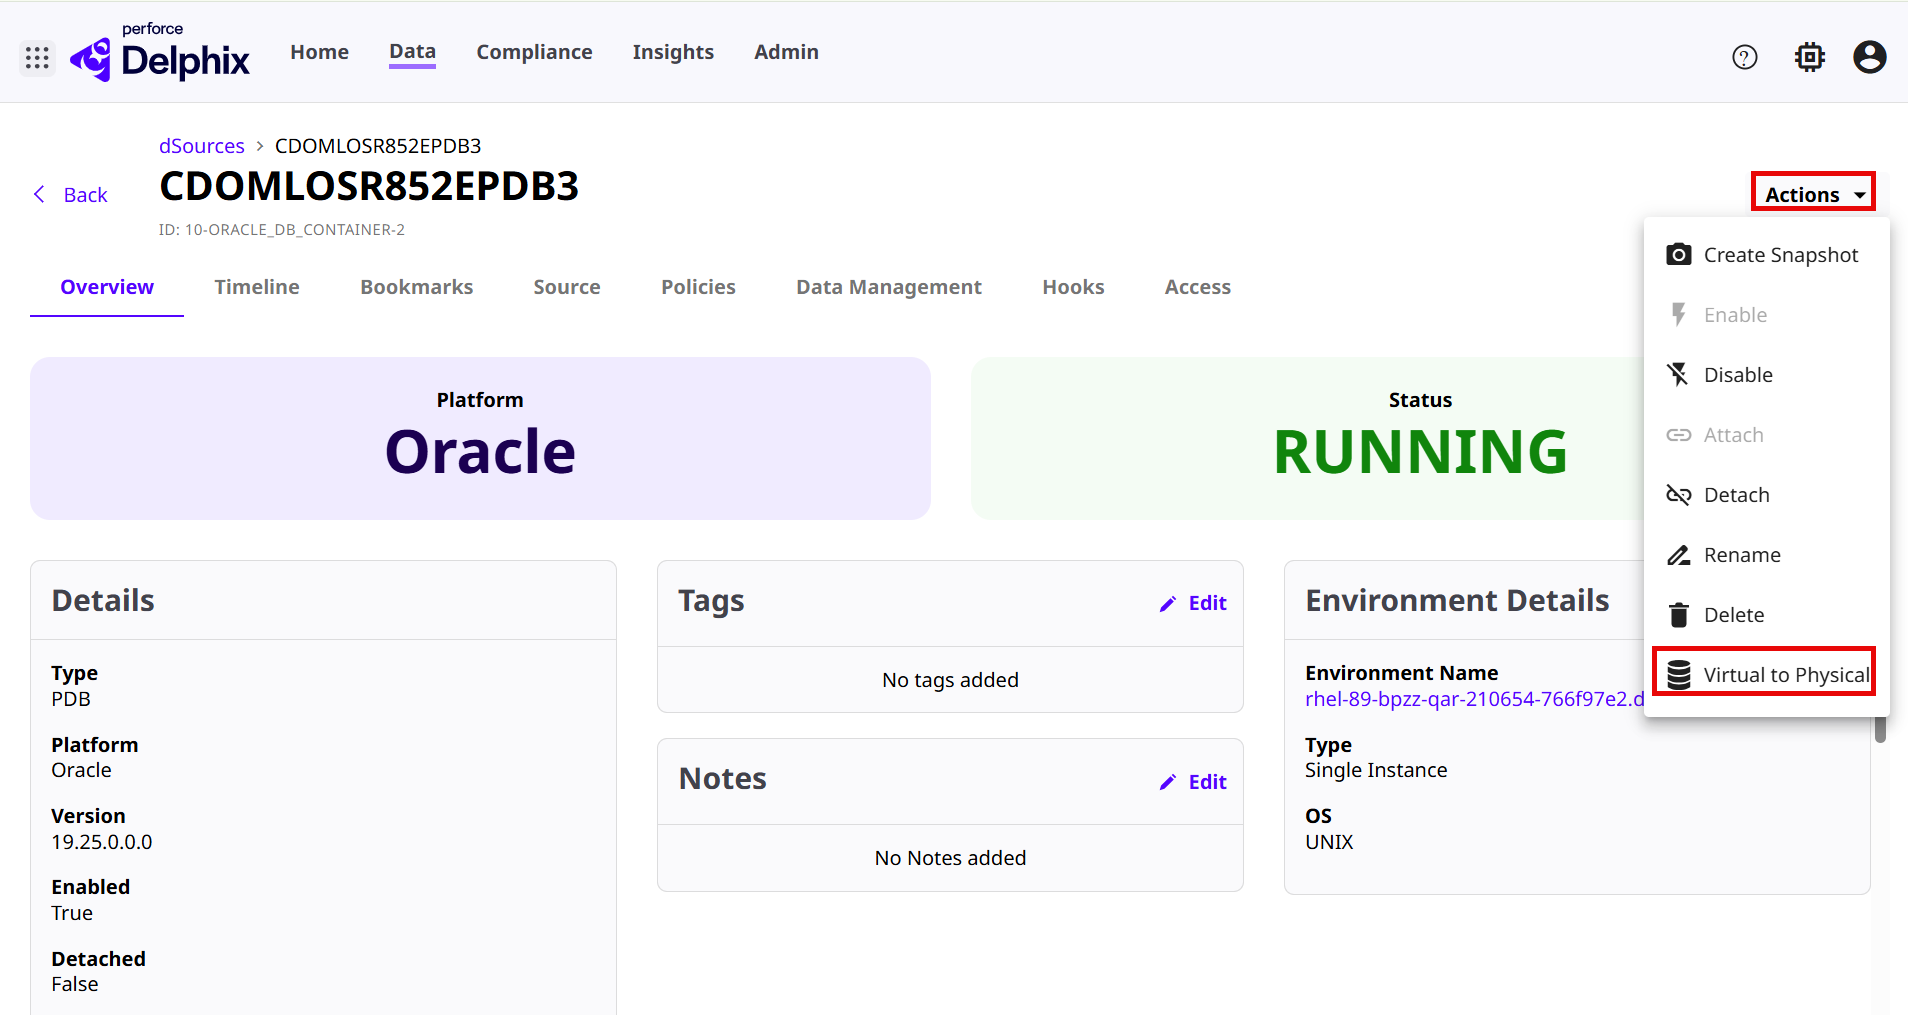
Click on the Actions menu and select the Virtual to Physical option.
-
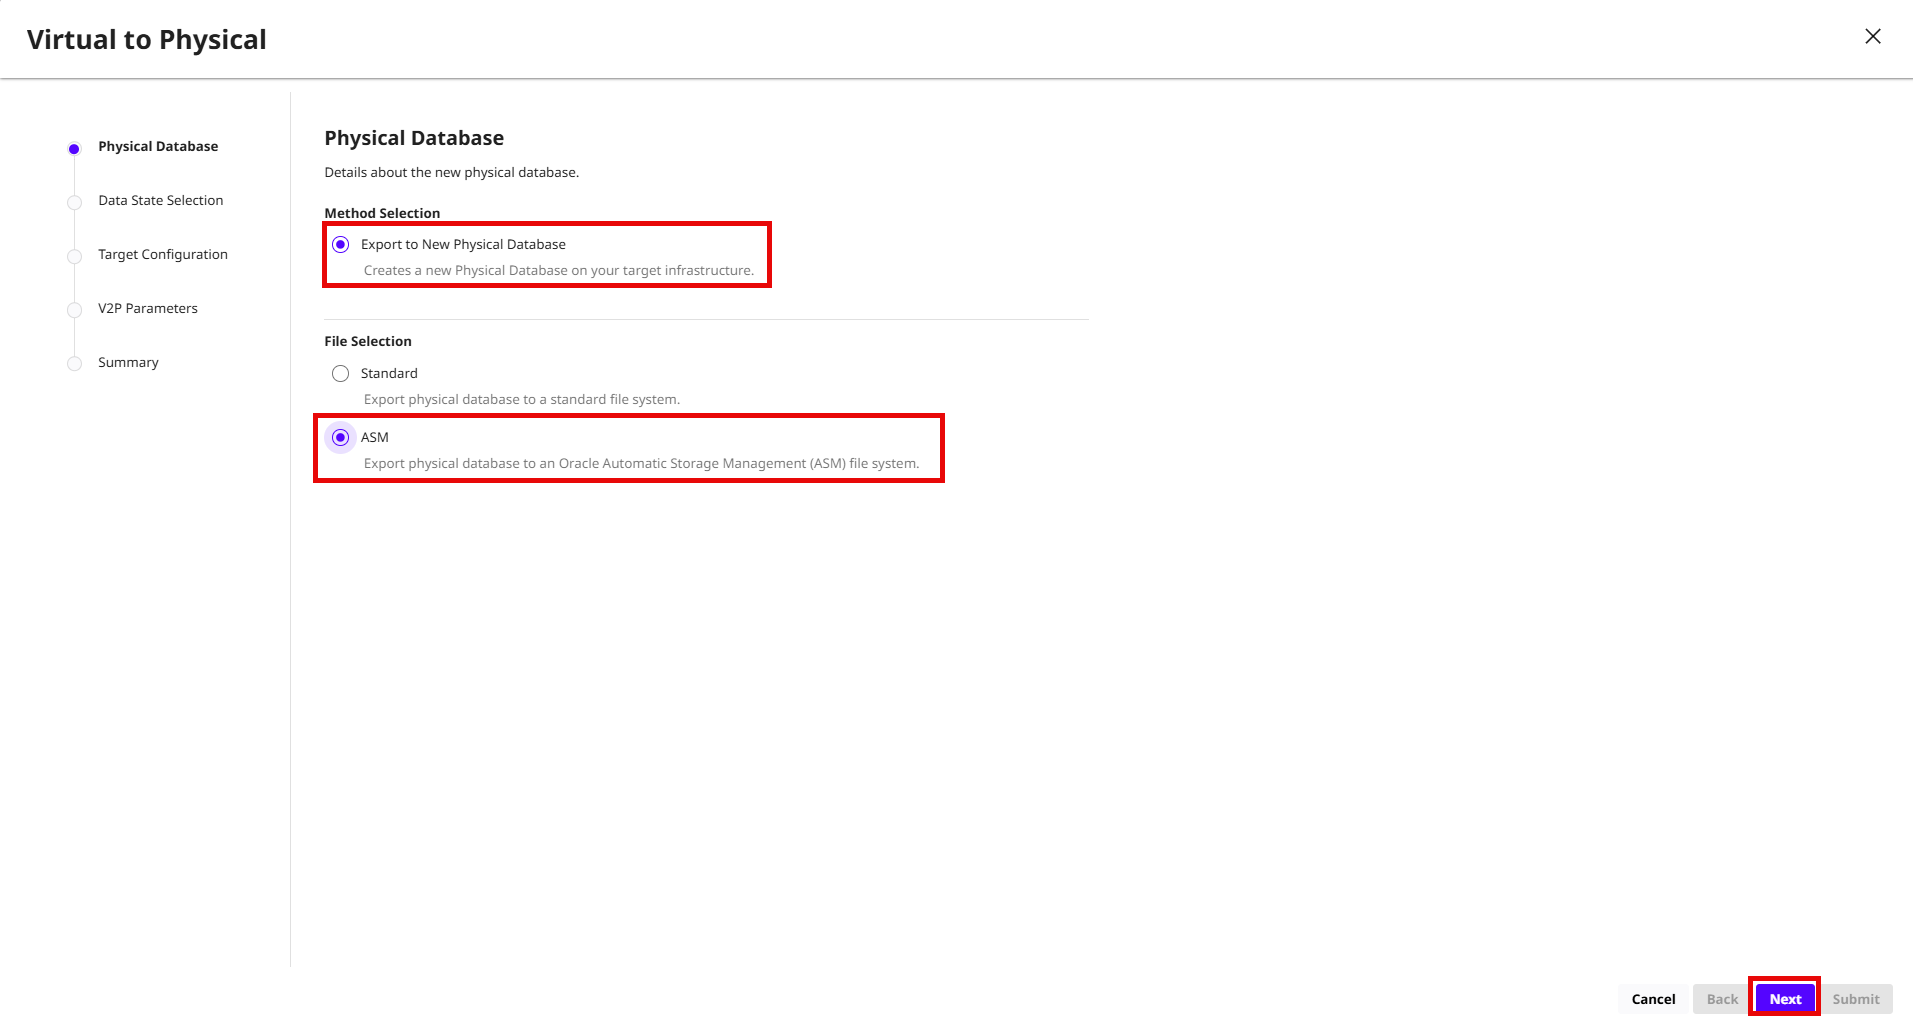
On the Virtual to Physical > Physical Database page, select the following options:
-
Method Selection: Select the Export to New Physical Database option to create new target database on the Target dSource.
-
File Selection: Select the ASM option to export physical database to a Oracle ASM file system.
-
Click Next.
-
-
On the Data State Selection page, select a Provision Point option and click Next.
-
On the Target Configuration page, enter the following configuration details:
- Environment: Name of the environment.
-
User: User name for the environment.
-
Installation Home: The Oracle Installation path for your database.
-
Container Database: The existing CDB for your environment.
-
Pluggable Database Name: Enter the name of the PDB.
-
Mount Base: Enter the mount base path.
-
RMAN Channel Size: Enter the number of RMAN channel size. For example, enter 1.
-
RMAN Section Size: Enter the RMAN Section Size. For example, enter 2.
-
Configure V2P Parameters: Select this check box to enter the V2P parameters.
-
Select the TDE Keystore Config Type to choose the following options:
-
Unset
-
File
-
HSM
-
OKV
-
OCI Vault
Additional parameters are visible based on the selection of the TDE Keystore config Type. For more information, read the Provision Oracle VDBs in DCT page.
-
-
Click Next.
-
On the V2P Configure Parameters page, click the + icon to add the Parameter Name and Value and click Next.
-
On the V2P Parameters page, enter the Target Data Disk Group path and click Next.
-
Review the V2P operation summary details and click Submit.