
How you change the DNS server depends on whether the Delphix Engine is using DHCP or a static network configuration.
When DHCP is enabled
When DHCP is enabled on the Delphix Engine, you cannot change the DNS server in the GUI. In this case, update the DNS server by using the command-line interface (CLI).
If you do not change the IP address, netmask, or other network interface properties, you do not need to shut down virtual databases (VDBs). Logging in through the hypervisor console for the Delphix Engine virtual machine is optional.
To update the DNS server via the CLI:
-
Connect to the Delphix Engine as the
sysadminuser. -
Run the following commands, replacing the example DNS server addresses with the appropriate values for your environment:
ssh -l sysadmin DelphixEngineName
Password:
DelphixEngineName> service dns
DelphixEngineName service dns> update
DelphixEngineName service dns update *> set servers=192.0.2.10,192.0.2.11
DelphixEngineName service dns update *> commit
DelphixEngineName service dns> exit
When DHCP is disabled (static IP)
When DHCP is disabled and the Delphix Engine uses a static IP address, you can update the DNS server through the GUI:
-
Log in to the Delphix Setup application with administrator credentials.
-
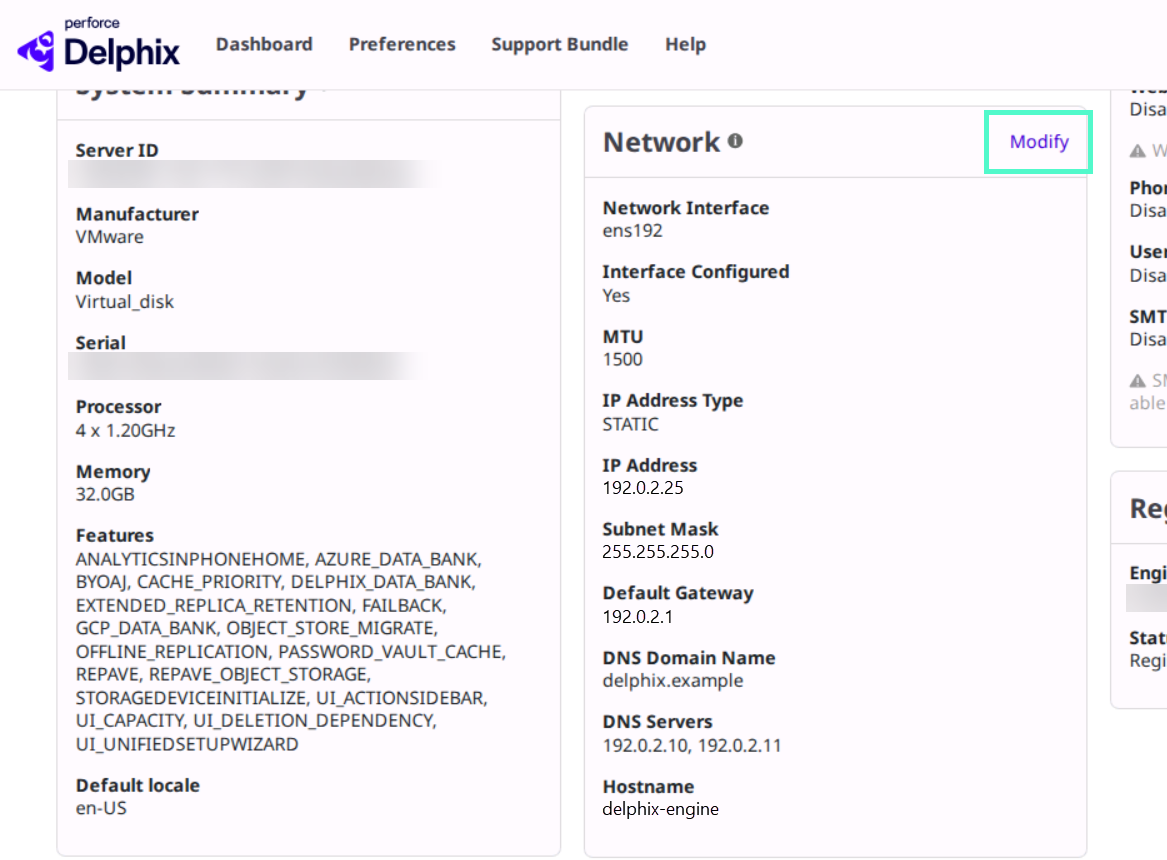
On the dashboard, locate the Network tile and select Modify.
-
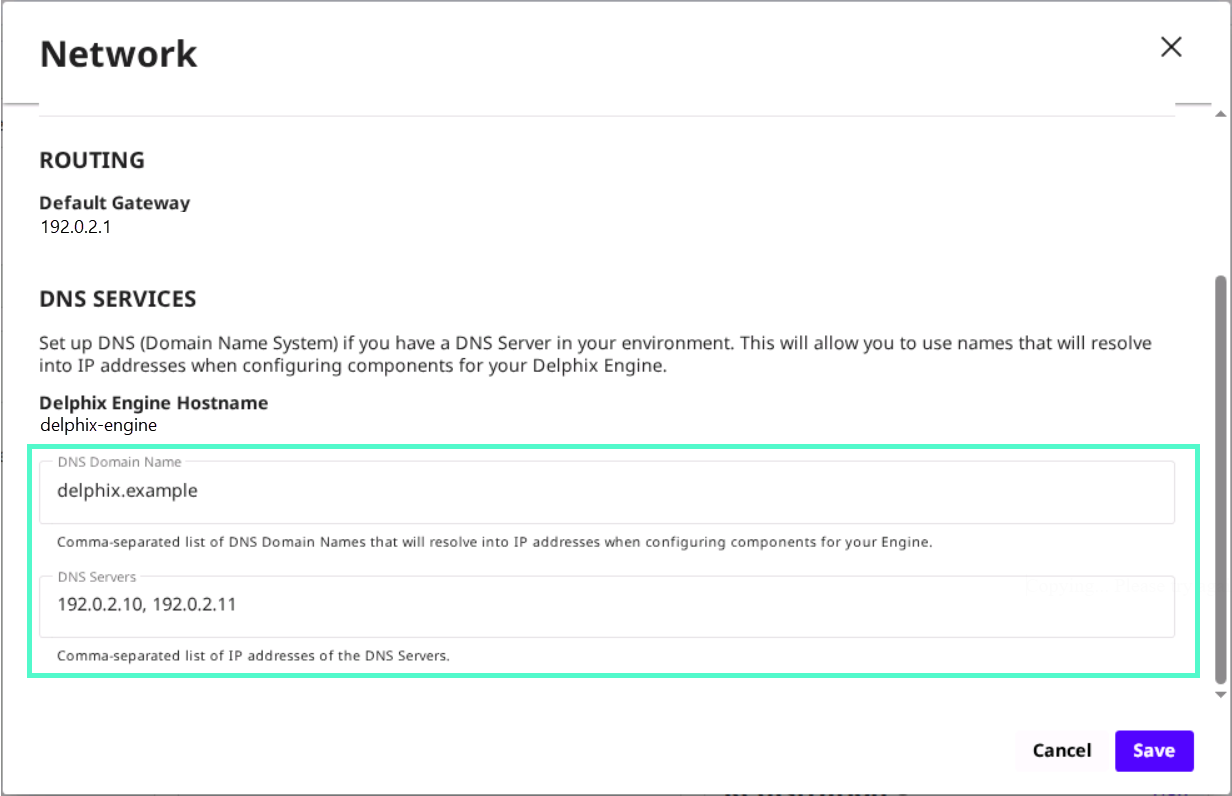
In the Network window, scroll to DNS Services.
-
Update the DNS Domain Name and DNS Servers fields as required.
- Click Save.
The Delphix Engine uses the updated DNS configuration for hostname resolution.